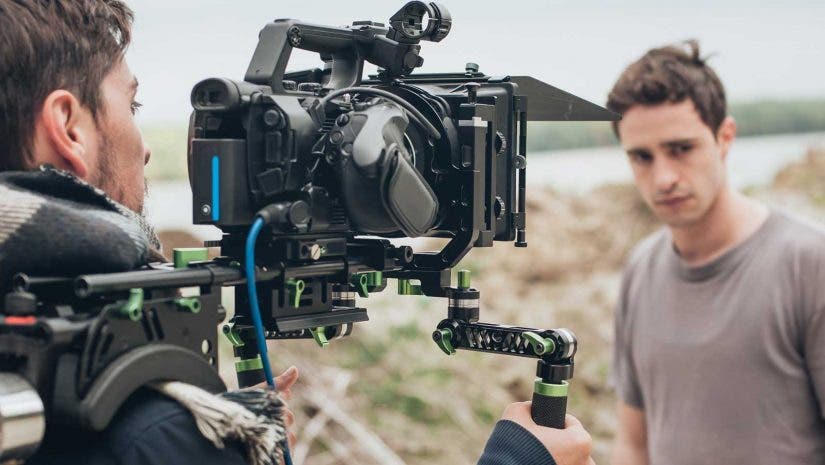
14 Basic Cinematography Techniques for Better Cinematic Shots
14 Basic Cinematography Techniques for Better Cinematic Shots
Do you dream of shooting your own music videos or feature films for a living? There are many important things that you’ll need to know and equip yourself with in order to get started in the field. But to really become a cinematographer, you’ll need more than just the gear and technical know-how.
Cinematography is all about the art of visual storytelling. Aside from skillfully operating a camera and setting up the lighting for every scene, it involves controlling what the viewer sees and how the image is presented to them — by choosing the right shooting techniques that best tell the story.
Below we’ve listed down some of the most widely-used cinematography techniques that can help dictate how your audience should feel about your scene, as well as how they will interpret it. These should help both aspiring and professional cinematographers create the most impactful and engaging films and music videos.
14 Basic Cinematography Techniques

Grab your cinema camera and get ready to try out these easy and familiar cinematography techniques that will help make your videos look more professional. We’ll also explain how the shots can affect your scene, so you can make your shots work together to form a beautiful, clear, and cohesive narrative.
1. Extreme long shot
The extreme long shot captures a very wide area to show the scale of subjects in relation to their environment, like tiny birds in a forest. It is typically used as an establishing shot when changing from one big area or city to another.
2. Bird’s eye shot
Like the extreme long shot, the bird’s eye shot shows massive scale but from a much higher angle, to the point where land starts to show abstract shapes and lines out of roads, buildings, and trees. It is also typically used as an establishing shot for introductions and scene transitions.
3. Long shot
The long, full, or wide shot is a significantly closer shot of an area where viewers can have a better look of what’s going on, but still not close enough to actually be emotionally involved in the scene. Subjects are also closer to the camera but far enough to have their whole bodies in view. It can be used to make your viewers feel like a casual bystander, such as when your leading actors are shown walking hand in hand while crossing the street.
To add just a little bit more intimacy, move in a little closer for a medium long shot until your subject is shown from the knees up. This allows better focus on a group of 2 to 3 people at the same time.
4. Medium shot
The medium shot allows viewers to move in a lot closer, but in a more informative way than emotional. The frame typically features a person from the waist up, and are used for general group scenes with dialogues and interviews.
You can also move in just a little bit closer for a medium close up shot to better show the expressions and emotions of an actor.
Simply frame the subject’s head up to about half of the chest to increase viewers’ focus on the person and show less of the surrounding. This is commonly used for documentaries and news programs.
5. Close up shot
The close up shot features just the entire head up to the chin or neck to allow viewers to feel more engaged and affected by the character’s emotions. By framing less of the background and more of just the face, you are able to create impact with the character’s facial expressions.
6. Extreme close up shot
An extreme close up shot is used sparingly and saved for moments when you need to increase the emotional intensity of a scene. You can do this by really zooming in on the character’s face, sometimes just on the eyes, or even the hands. It works just as well for objects, like the ticking hands of a clock or brush strokes. While these shots greatly lack context, it’s great for setting the mood or adding drama and intimacy.
7. Dutch angle shot
To execute the dutch angle shot, you simply need to rotate the camera to either side until verticals (like people and buildings) are tilted and the horizon is no longer parallel with the bottom of the frame. It’s another shot that’s used sparingly in narrative filmmaking, usually to portray uneasiness and disorientation. You can use this to show a character’s unstable emotional or mental state, or add an unsettling feeling to a particular scene.
8. Over-the-shoulder shot
As the name suggests, the over-the-shoulder shot shows an out-of-focus shoulder and head in the foreground while another person, object, or the background is in focus. It’s one of the most essential cinematography techniques for use in narrative filmmaking as it not only adds that much-needed depth to a shot but also aids in making conversational scenes look as natural to the viewer as possible.
9. Tilt shot
The tilt shot is as easy as it sounds, but the best way to turn this simple technique into an elegant shot is to carefully coordinate the careful upward or downward camera movement with some action within the scene. It can be used as an establishing shot of a wide-angle view or for slowly revealing something at the end of the shot.
10. Panning shot
The panning shot is the horizontal equivalent of the tilt shot. They can be used simply to show the surroundings, but you can achieve truly professional results with it by keeping the panning smooth and accurate (make sure to use a gimbal stabilizer or something similar), especially when there’s action and a carefully composed final frame involved. Remember, such movements should be well-executed to look very natural and almost unnoticeable so as not to distract the viewers from the story.
11. Zoom shot
The use of the zoom shot has evolved over time — from being jerky, fast, and cheesy to being a lot slower and smoother to create a more natural zoom effect that doesn’t distract viewers. Needless to say, it increases the focus on a scene, an object, or a character.
You can also try the dolly zoom shot, which creates a dizzying “vertigo effect” that can be perfect for suspense films. It works by smoothly zooming out with the lens while the camera (and dolly) moves closer to the subject in perfect coordination.
12. Crane shot
The crane shot captures vertical translational motion by moving the camera up or down by a couple of feet. It used to be achieved with huge and expensive cranes, but it can now be replicated with drone cameras. Fortunately, it’s a shot that doesn’t always have to be in every film, but it’s a great shot that will add production value to your work.
13. Tracking shot
You can very well do without a crane shot, but you’ll probably have to include tracking shots to your film at some point. An important tool for this type of shot is a dolly, which is basically a wheeled cart that moves along a rail track, but it can also be achieved with a Steadicam and other innovative motion control gear. You may even use a drone—specifically one with a tracking flight mode like the DJI Mavic Pro, which comes with an ActiveTrack mode that allows you to choose a subject (whether a person, a vehicle, or even an animal) for the aircraft to follow.
With a dolly track, you can create smoother movements and follow your subject as it leaves the frame, or simply add dynamism to an otherwise static camera shot. You can even combine the tracking shot with an over-the-shoulder shot or use any other (out-of-focus) object in the foreground to add depth and enhance the 3D illusion in your shot.
14. Point-of-view shot
Finally, another important shot that you can make use of (in case it works for your story) is the point-of-view (POV) or first-person shot. Your camera can either be steady or moving along its axis, as long as it shows how and where viewers should look at or scan the scene and make them feel like they’re in the movie. It can also be accomplished by fitting your subject with a camera mount, similar to the GoPro footage above.
It’s not the most aesthetically-pleasing shot and can sometimes be dizzying for viewers (such as in movies like the “Blair Witch Project”), but it’s one of the best ways to make your film all the more immersive and engaging.

Comments
Post a Comment